A product launch rarely starts with a perfect video.
The first cut may have a template mark in the corner. A draft export may carry an old campaign logo. A licensed clip may need a permitted overlay removed before the footage can fit the new creative. The video may also look softer than expected after several rounds of editing.
None of those problems means the footage has to be thrown away.
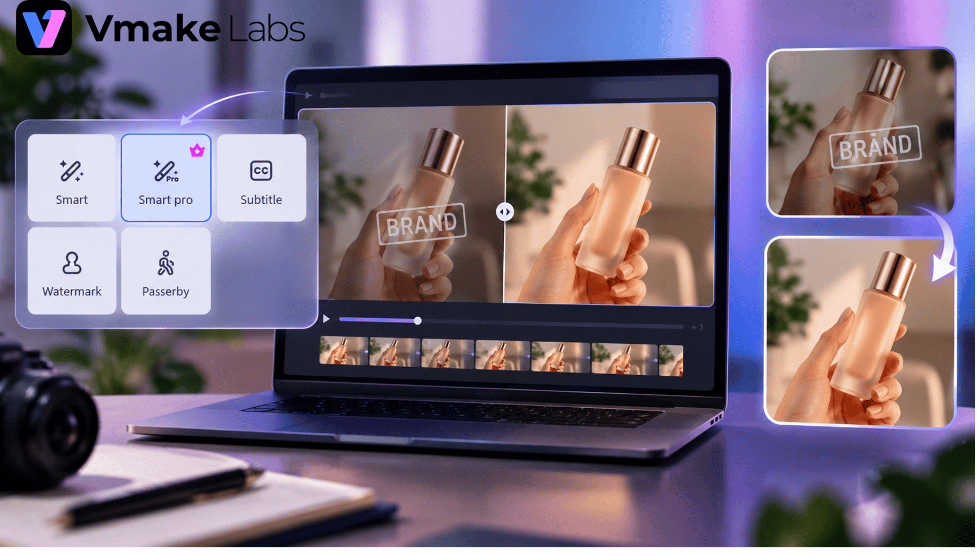
For brands working with their own or properly licensed assets, Vmake Labs can handle several of these cleanup and enhancement steps in one workflow. Its Smart Pro removal tool can tackle difficult on-screen text and watermark removal, while the video enhancement tools can improve footage that still looks soft after cleanup.
Here is how launch teams actually use it when time is short.
Step 1: Clean the draft with Smart Pro
For your own authorized footage, start with removal. This is where Vmake Labs works as a free video watermark remover for difficult cases.
Smart Pro is the more advanced removal option in Vmake Labs. It is designed for video elements that are harder to remove with basic cleanup tools. Instead of simply blurring or masking the selected area, it analyzes the unwanted element across the video and works to reconstruct the background behind it.
That makes it useful when the mark moves, changes position, sits over a detailed surface, or appears alongside other on-screen elements.
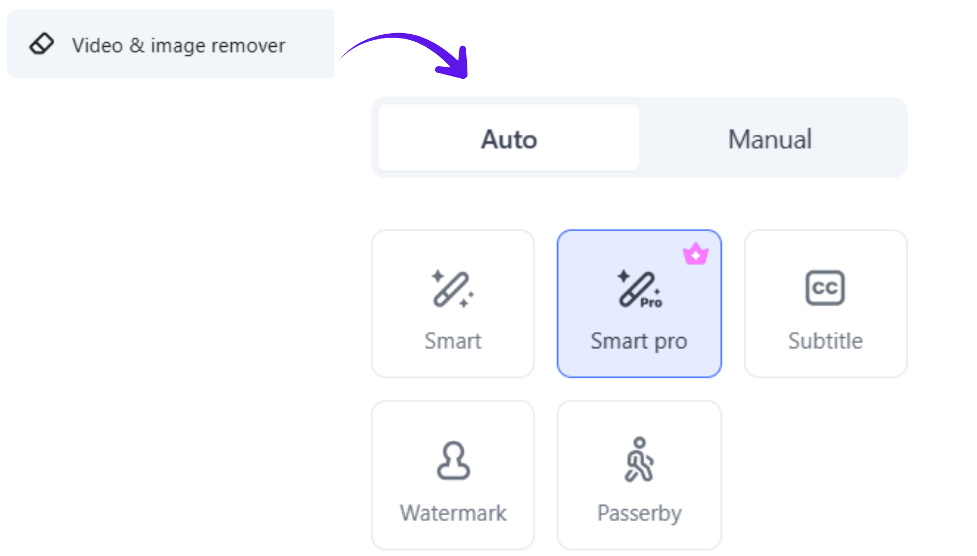
Standard removal works well for solid, static marks on flat backgrounds. Smart Pro is built for the harder ones:
- Small and thin text that basic detectors may miss
- Semi-transparent logos sitting over moving products or faces
- Multiple marks on different timelines, such as a corner bug for 10 seconds plus animated subtitles in the center
- Text over complex textures where a blur would damage the background
Smart Pro works frame by frame to identify the selected element and rebuild the area behind it. A successful removal should preserve the surrounding details instead of leaving an obvious blurred patch.
That matters when the mark sits over wood grain, fabric, skin, product packaging, or another detailed part of the shot.
How to use it in a launch workflow:
Use the cleanest source you own. Do not start from a twice-compressed social download if you have the camera original. As shown below, open Video & Image Remover from the left menu.
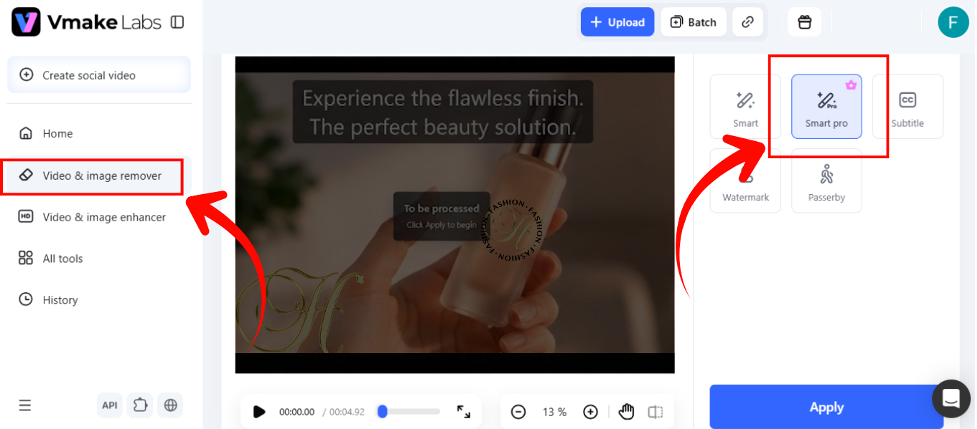
Then, upload your own clips to Vmake Labs and run Smart Pro. Check the preview at 100% on tricky frames, especially where text sits on fabric, skin, or a moving product.
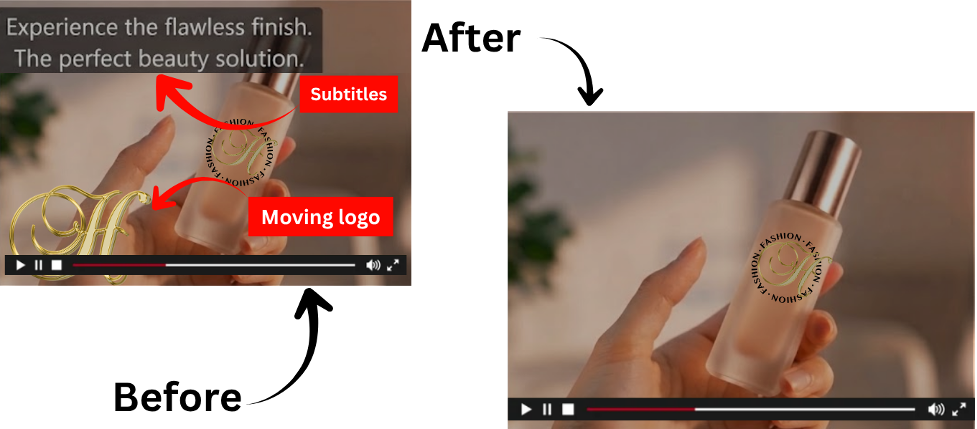
For launch teams working fast, this cleanup saves a reshoot. Once Smart Pro gives you a clean preview, save it. That clean version then becomes the source for all your next steps — enhancement, comparison, and reframing for different placements.
Step 2: Enhance after you clean
The next step is to run the cleaned footage through Vmake Labs’ video enhancer. This pass focuses on image quality rather than removing unwanted elements.
Vmake Labs offers different enhancement options depending on the type of footage and the final output. Quality mode supports quick 2K enhancement for everyday content, while Master mode can produce 2K, 4K, or 8K versions for assets that need more detail.
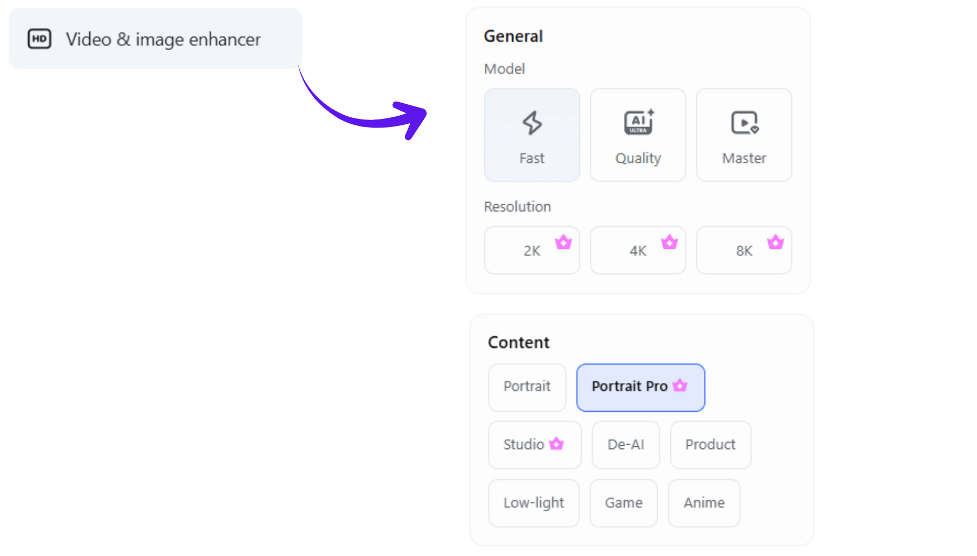
Master mode also includes different scenes for specific content. Choose the setting based on the campaign rather than simply selecting the highest resolution available. The goal is footage that looks cleaner and sharper without looking heavily processed.
How to use it in a launch workflow:
As shown below, after cleaning, open Video & Image Enhancer from the left menu, then select Master as the model. For product heroes that need to work across placements — website, paid ads, and social — set Resolution to 4K or 8K so you have room to crop.
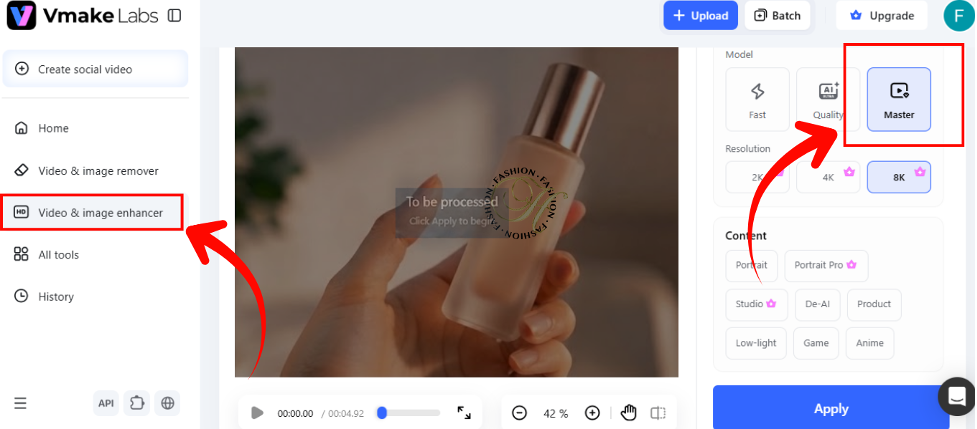
Then pick the scene that matches your footage. Studio works well for product-focused shots like this foundation bottle, while Portrait Pro is designed for videos where a founder or creator is the main subject.
Keep Product / Portrait / Studio in mind when batching. You can batch similar scenes together so the enhancement stays consistent across the campaign.
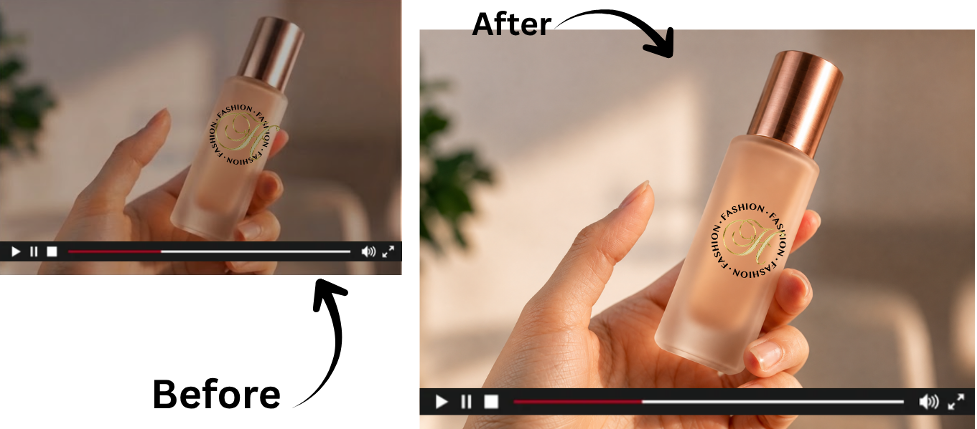
After enhancement, pause on the frames where texture sells the product. In the example above, the Before is soft from multiple exports — the label texture, skin detail, and the frosted glass edge lose definition. After a Master pass in Studio, the edges are crisp, the cap highlight is clean, and the label stays readable without looking plastic.
Step 3: Create the final ad versions
The enhanced master can now move into the editing stage.
A launch team may need several versions of the same footage. One cut could be used for a product page, another for paid social, and a shorter version for a retargeting campaign. Starting with a clean, higher-quality master gives editors more room to crop and reframe the footage.
Keep the original file too. The enhanced version should become another usable asset in the library, not replace the source.
Step 4: Export versions for each placement
Do not use the same export for every part of the campaign unless the placements call for it.
The cleaned and enhanced file can serve as the main source. From there, create the versions needed for the launch.
For example:
- Product page: Keep more of the original framing if the product needs room to breathe.
- Paid social: Use a tighter crop and keep the main subject clear in the opening seconds.
- Retargeting: Cut the footage around the strongest product or offer moment.
- Vertical placements: Reframe the master instead of stretching a horizontal export.
This approach also makes future edits easier. If the campaign needs a new cut later, the team can return to the clean file instead of starting with the watermarked or heavily compressed draft.
The finished workflow
The full process is fairly simple:
Clean → review → enhance → compare → reframe → export
Smart Pro handles the cleanup stage when an authorized video contains difficult text or watermark elements. The Vmake Labs video enhancer handles the quality pass afterward.
That order keeps each tool focused on a specific problem. It also gives the launch team a base file to work from.
For brands with a library of older drafts, this can be a practical way to recover useful footage before paying for another shoot. A video that started with an unwanted overlay and soft image quality may still have everything needed for the next campaign.